 Mountain Bike Reviewed Best Mountain Bikes Under $1000

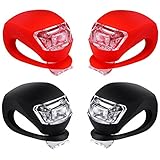

Whether you’re commuting or riding for fitness, there will come a time when you’ll get caught riding in the dark. For some, the decision to hit the trails after dark stems from having a busy schedule. Avid cyclists who are trying to squeeze in a bit more ride time end up hitting the trails at night. Cyclists who intend to ride their bike in the dark will benefit from a proper set of mountain bike lights.
Moutain bike lights allow you to see better in the dark, but most importantly, they will make you as visible as possible on the road. These lights will not only enhance your night riding experience, it will also ensure that you ride in the evening in safety. The more visible you are, the safer you’ll be.
If you are planning to invest in night lights, then we encourage you to read on. Here are 6 things you need to consider when purchasing mountain bike lights.

Image Source:www.bestadvisor.com
Consider Your Riding Style
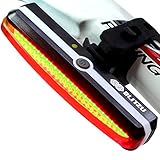
Trail riding and road riding requires different sets of mountain bike lights. If you’re a commuter, your primary purpose of installing lights is visibility. To ensure safety on the road, you need to be seen by other motorists and pedestrians. Lights that are used to see with have wide beam angles, smaller batteries, are often lighter and more affordable. Opt for a low to moderate amount of lumens with a broad enough beam to be seen from the front, back, as well as the side. The lights must also be visible from 200 m.
Trail riders, on the other hand, need lights to see with. With that said, opt for mountain bike lights that have higher lumen count and narrow beam angle to see into the distance. These lights are designed to illuminate the area directly to see rocks, tree roots, and other obstacles.
When shopping for bicycle lights, the first thing you need to do is to decide whether you’ll be using the lights to see or be seen.
Check Light Performance
Regular commuters will need lights that can be seen both during the day and night. As such, lights with low lumen counts will do for road riders. If you decide to purchase a light with a higher lumen count, we recommend that you tilt the light downwards so it doesn’t distract or blind oncoming traffic. If you are trail riding and looking for the best light to see, you should be looking for lights with a higher lumen and narrow beam angle.
Bike light lumen counts start at 30 and can go as high as 2,000. Some lights let you alter the brightness. This is especially beneficial for cyclists who travel between well-lit and poorly lit areas.
How Much Are You Willing to Spend?
There are lots of mountain bike lights on the market, with so many different builds, models, and brands to offer. Price varies depending on the type of light you need. Some are more expensive than the others.
Bicycle lights usually range between $150 and $350. Often, the more affordable ones are lights that are purely used to be seen. If you usually do trail riding or ride in low-lit areas, you may want to stretch your budget a bit more. Generally, the more expensive the light is, the higher the light output.
If you want the best light for your bike, be prepared to shell out $250 and above. These lights, although costly, come with more advanced features. Lights in this price can be used in all conditions and across all disciplines. Since the battery is bigger, the runtime is also improved. What’s more, light settings and options become more advanced. The more expensive lights also feature premium components and are built to last. If you are an avid cyclist and you have the budget for it, you may want to invest in these types of lights.
Figure out How Long Your Rides Will Be
Bicycle lights are essential as they allow you to see in case you do ride at night. Since most mountain bike lights are battery operated, it is important to consider how long your rides usually take. Do you usually ride for a couple of hours or several hours?
The battery life depends on the lighting mode you use. Most bicycle lights come with several light modes. This lets you switch between flashing and steady modes. A steady beam uses more power than a flashing light. However, the flashing mode is of no use during the night since it will be difficult to see well with a flashing light.
For battery-operated lights, make sure that they are easily attainable from local stores and supermarket. If you have the budget, we highly recommend that you get an extra battery pack to avoid problems due to short battery runtime.
Consider the Mounting option
Most mountain bike lights can easily be mounted on seat posts, frames, and handlebars. If your bike comes with a standard circular bar, you can easily mount and secure the lights using a stretchable rubber strap, a screw or a Velcro. But for mountain bikes with aero seat posts and aero bars, the mounting of the bike can be quite complicated.
Before shopping for mountain bike lights, make sure that you determine what type of handlebars your bike has. This way, it will be easier for you to find lights that will work well with your ride. Also, you need to take the bike frame into consideration. Carbon is a stiff material, but it doesn’t have the same durability as aluminum. Carbon frames may crack when over-tightened. As such, it is best to use lights with a Velcro or stretchable rubber strap. Also, look for lights with interchangeable mounting straps that allow for the different post and handlebar diameters.
You want to make sure that the light you get is compatible with your bike. There is no point in investing in the most expensive lights with long runtime if you can’t mount in on your bike.
Last update on 2023-07-30 at 10:07 / Affiliate links / Images from Amazon Product Advertising API


